This cheek riser was cheap, easy to make, and lets me a get a great sight picture every time.
Proper cheek weld is critical for quick target acquisition. If you can’t shoulder your rifle and immediately position your eye to the proper height above your stock and distance from your scope, you’ll spend a few seconds getting a good sight picture. In those few seconds, your prize buck will have moved on to your neighbor’s pasture.
Trust me. It happened last deer season. Not fun.
To make sure I get ’em next year, I decided to make a Kydex cheek riser and install it on my rifle. I could have ordered one, but making it myself allowed me to customize it to my rifle. Plus, it’s way more fun.
Step 1
Kydex is widely available from online retailers. I got five of these sheets for about $25.
Step 2
This is the pattern I used. You can draw something similar or tweak it to fit your needs.
Step 3
Before cutting the Kydex, it’s important to test the paper pattern on your rifle to make sure it fits.
Step 4
Lay the stencil on top of the Kydex sheet and draw the outline.
Step 5
A jig-saw worked well to cut the outer portion of the riser. I also could have used the Dremel, but it would have taken longer.
Step 6
Don’t worry if your initial cut is a little rough. A heavy-grit sandpaper will smooth it right up.
Step 7
I used a Dremel tool and a cut wheel to take out the inner slits…
Step 8
…and smoothed out the cuts with a thin sanding drum. Sandpaper would have worked as well.
Step 9
Once everything looked smooth, I popped it into my Redneck Easy Bake Oven at 350 degrees for about 7 minutes.
Step 10
This step took two hands, so I wasn’t able to get a real-time photo. But once the Kydex is pliable, you just bend it around the stock and wait until it re-hardens. Be sure to use gloves. It’s hot.
Step 11
You can use whatever hardware you think is best. I just used these simple threaded bolts. Keep in mind that if the bolts are too long you’ll have to cut them to the right length.
Step 12
Get the riser about where you think it should be and mark where you want the drill holes. I suggest using some kind of vise to keep the stock steady while you drill.
Step 13
I started with a smaller bit and worked my way up. Keep in mind that if you have a synthetic stock it will probably be hollow in the middle.
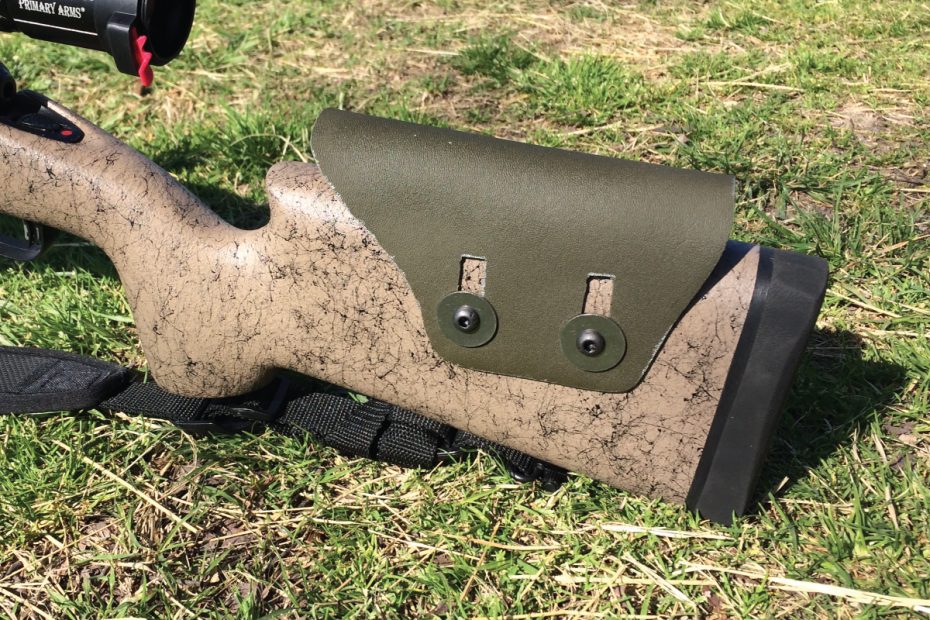
Step 14
Once you have the holes drilled, all you have to do is install the hardware and tighten it up. I plan to use it for a few range sessions so I know exactly how high I want the riser. Then, I’ll make sure it’s snug and use a little blue Loctite on the bolts.
Working with Kydex was much easier than I expected. It’s cheap, easy to cut, and doesn’t take long to soften. I had never made anything with it before this, so if you don’t have any experience with Kydex don’t worry about trying your hand.
The riser itself works great. I’m now able to shoulder my rifle and immediately get a good sight picture. I can also raise or lower the riser to fit my shooting position, and angle it downwards or upwards.
If you struggle sometimes to see through your scope, I’d definitely recommend making a Kydex cheek riser.
If you’re interested in the Savage 11 Hog Hunter (which I highly recommend and reviewed here), you can find one on GunsAmerica for a great price. You can also read about how I swapped out the factory stock for a[track-link url=”https://www.bellandcarlson.com/” campaign=”BellCarson” target=”_blank”] Bell and Carson[/track-link].