Part 1 of 2
This article is the first of two on thermal optics. Below I touch briefly on night vision, cover how I arrived at investing in thermal optics, and profile the iray MH25 thermal scanner. The next article will cover the Bering Optics Super Hogster thermal riflescope. These are each mid-level thermal units – not the most expensive and not the cheapest either. Both offer excellent night hunting performance for coyotes, hogs, and other legally huntable night game.
Hunting coyotes is my favorite type of hunting. I do so for a variety of reasons, but mostly for the challenge and excitement. In most areas, you can hunt coyotes year-round, and often day or night. Night hunting adds new opportunities and challenges that don’t exist during the daytime. Opportunities include predators being more confident at night, extended hunting hours, and an increased chance of hunting undetected due to the darkness. Night hunting challenges are many. Doing the most basic things in the dark is not as easy to do as in the daylight. Where is the trail? How am I going to change this battery? Where did I leave my shooting sticks? I hunt coyotes both day and night, and both environments are rewarding in their own way.
Long ago there were two options for seeing at night for coyote hunting: moonlight or flashlights. White lights were the original flashlight technology, and eventually, colored LEDs became available. If you don’t already follow them, the guys on Night Crew (Sportsman Channel and/or YouTube) have great success with white lights. Today night hunters have two more options for seeing at night: PVS-style night vision and thermal optics.

Night Vision
PVS-14 style night vision uses technology that amplifies ambient light. In complete darkness, you can’t see anything with a PVS-14, but even a little light goes a long way. On a moonless night, you can see more stars than you ever imagined by using a PVS-14. To see well enough to detect and identify game at night, an infrared (IR) illuminator is usually required. IR illuminators are invisible to the naked eye, but with night vision on they are very much like a flashlight. As with other flashlights, there are many models offered with a variety of performance metrics. One IR illuminator I use is a Torch Pro from TNVC ($250). I also have a combination IR laser/illuminator unit called the D^2 from Steiner.
Many years ago my wife surprised me with a Gen 3 PVS-14 on my birthday. I married up in more than one way. Suddenly I could see everything at night, which sounds great, and it is. But that’s also the problem with night vision – you can see everything. What’s that old saying? If everything is important, nothing is. Well, night vision is similar. If you can see everything it is difficult to see what’s important. And that is the beauty of thermal night vision, you see what is most important. As soon as I looked through a thermal device I was hooked. It’s just that much better than night vision for hunting.

Thermal Optics
While PVS-14 style night vision amplifies available light, thermal devices “see” in another wavelength of the light spectrum. I will admit that I do not completely understand the science, but I do understand what thermal does. You see the heat signature of an object, or images that are defined by the relative difference of an object’s heat as compared to its surroundings. Warm-blooded animals, for example, are typically quite a bit warmer than their environment. As such they tend to glow quite brightly when viewed through a thermal device. It is this contrast that makes thermal so useful for night hunting. You can scan the terrain and if there’s a coyote there it will stick out like a neon sign. Watch an old Predator movie and you will get the idea.

Technology generally becomes smaller, better, and cheaper over time, and for thermal optics, this has also been the case. The first thermal units were big and heavy, relying on large Germanium objective lenses. It is the Germanium that makes thermal devices expensive, so being able to decrease the lens size allows for a less expensive unit. There is a relationship between the size of the objective lens (and so the cost), the pixel size of the processor, and the resulting resolution of a thermal scope. Until recently, most thermal scopes were using a 17-micron pixel pitch (distance between pixels – smaller number is better), which could be found in both 380×280 and 640x 480 resolution thermals. In the past couple of years, 12-micron pixel pitch have been produced, which allow smaller objective lenses while achieving good resolution.
When considering the resolution, think about it the same way you would think about a traditional riflescope: better resolution costs more and means you can more clearly make out what you are viewing. Thermal is the same way. Resolution of 380×280 will be more pixelated and blotchy, as compared to 640×480 resolution. The difference is performance, but that usually comes at a price. Buy the highest resolution you can afford.
The Mini MH25
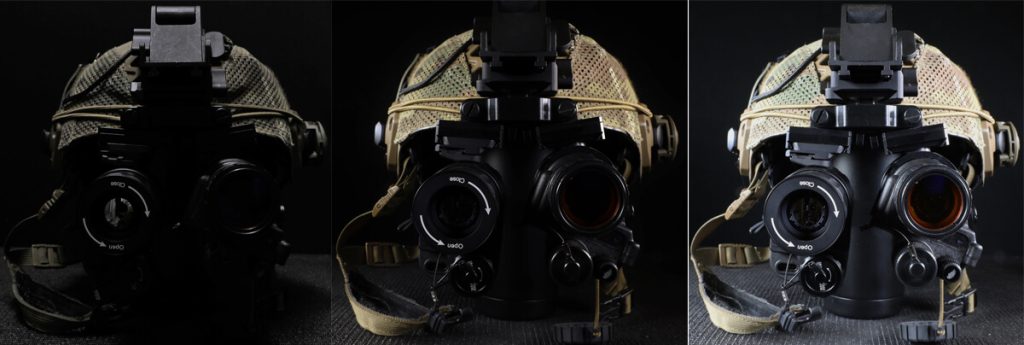
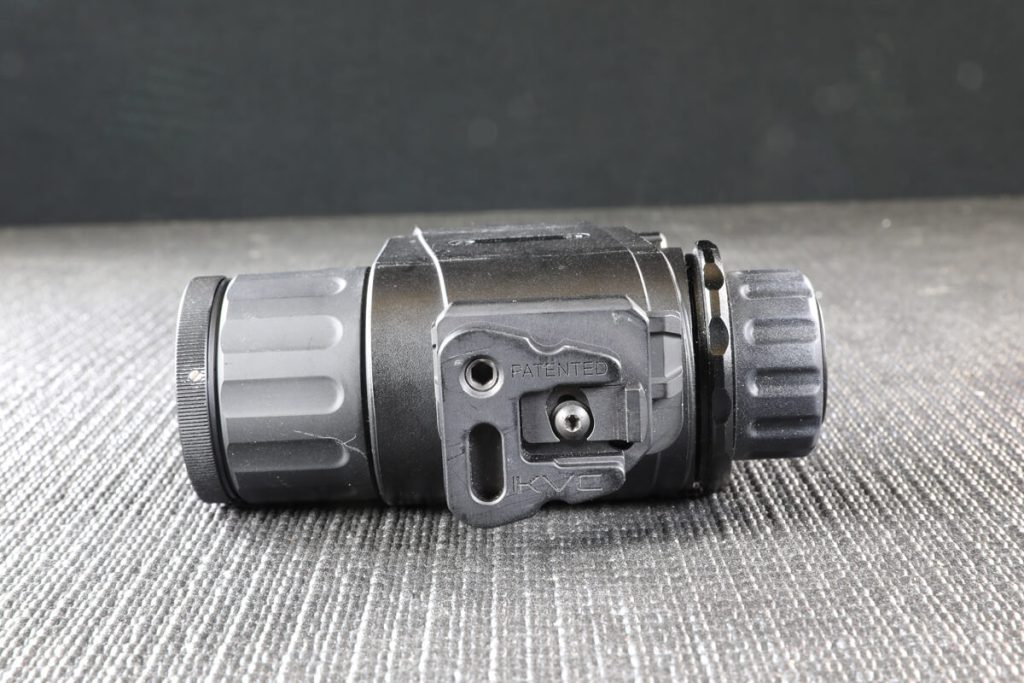
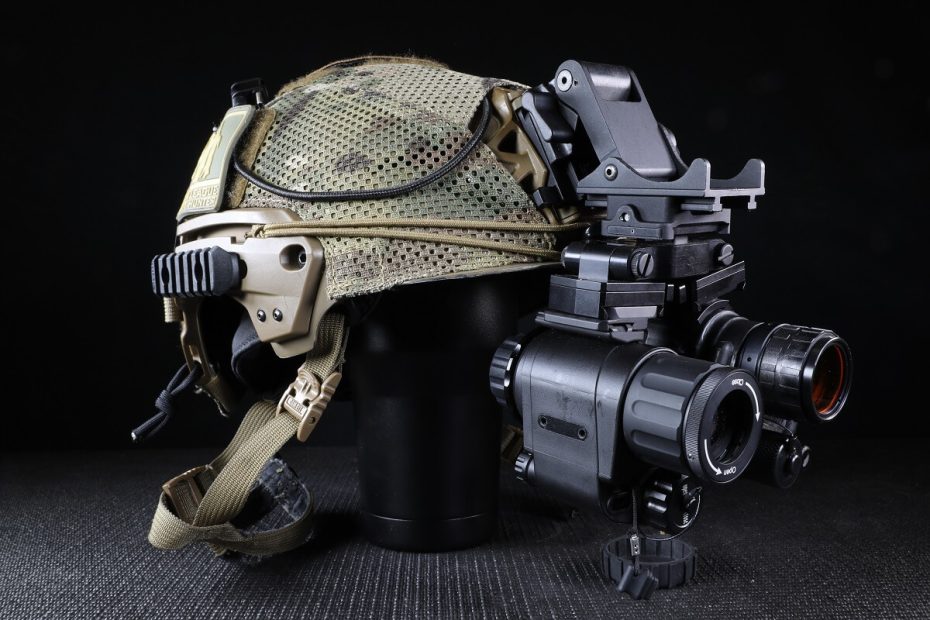
When researching thermal scanners I talked to as many experienced people as I knew. Eventually, that research led me to Tyler Adair at Ultimate Night Vision. I explained what I was after, what I had heard about available units, and generally picked Tyler’s brain. The result was I bought an MH25 from Ultimate Night Vision. The MH25 from InfiRay USA is a multifunction thermal scanner. It may be used on a lanyard as a handheld device to quickly scan an area, or it may be helmet mounted. I’ve been using mine for about a year now, and it’s very impressive. Weighing just 245 grams it is extremely lightweight, and easy to pack along. Using a 12-micron core, its 640×512 resolution is startlingly clear. I have detected and identified coyotes at over 500 yards – well in excess of my effective shooting range at night. Cattle are easily identifiable at 800 yards in complete darkness (or during the day for that matter), and jackrabbits glow in the grasslands like candles in the night.

The MH25 has one adjustment knob to allow the user to turn the unit on/off, configure settings, change color palettes, etc. Having just one adjustment knob may not seem significant, but keeping things simple really matters in the dark. Having only one knob to search for and manipulate makes the MH25 easy to operate. The knob has tactile, audible clicks, and may be pressed or rotated. The user interface is intuitive and quickly mastered after a short period of time. The unit is turned on by pressing the knob for three seconds, and off by pointing the objective straight down and holding the button for three seconds. Once the unit is turned on, rotating the knob activates the digital zoom feature in 0.1x increments up to 8.0x.
Accessing the Quick Command Menu (QCM) is accomplished by momentarily pressing the knob after the unit is on. There the options for NUC, color palette, and brightness reside. NUC stands for Non-Uniformity Correction and it’s something common to all thermal devices. Immediately after a NUC, the image is as clear as it is going to get, then it slowly starts to degrade. This has to do with the unit’s own heat interfering with the readings. Think of the NUC as a way to clear up the image by recalibrating all the noise away. Manual NUCing the MH25 is super easy, with just two quick presses of the adjustment knob (the first press accesses the QCM and the second initiates a manual NUC). When using thermal it is important to be able to quickly and intuitively NUC, and the double press used by the MH25 is fast, easy, and simple to recall.
When operating the MH25, depressing the knob for three seconds (while not pointing straight down) activates the extended menu. There reside the adjustments for setting NUC to manual or automatic, brightness calibration, helmet mode, and a few other things. Other than the NUC setting I rarely access this menu.
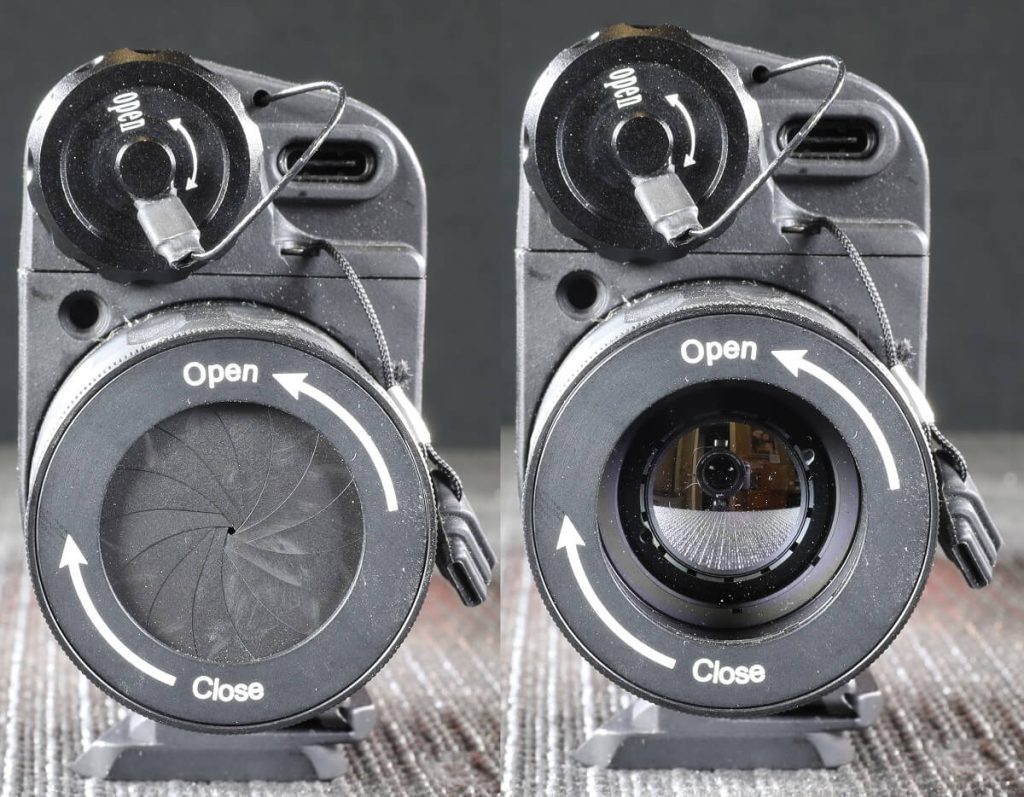
The objective lens has a manual focus ring that is adjustable from just a few feet to infinity. It also has an iris-style lens cover. Though the iris lens protector is a novel feature I don’t really care for it and prefer a flip-up cap. The Vortex Defender Flip Cap 0-32 fits well. When mounting to a helmet, a PVS-14 style eyepiece is required for optimal performance (this is an extra $330). The unit was shipped with two 16340 rechargeable batteries, and it tends to consume them quickly. Alternatively, CR123 batteries or an external power bank may be used for longer run times. For scanning the entire night an external power supply is a must.

In The Field
What has it been like to transition from PVS-14 night vision to thermal? The phrase “game-changer” gets thrown around often, but thermal is just that. As stated above, thermal optics draw the hunter’s attention to what’s important – animals. You can also see trees, rocks, paths, and even barbed wire fences, but it’s the animals that just plain glow. With PVS-14 night vision or white lights, you typically detect movement first and then you work to identify what animal you are viewing. With thermal, you just scan until you see the glowing object and then work to identify it. I’ve used dual PVS-14s with a powerful IR illuminator and that system works well. However, the degree to which thermal aids in detection is probably a factor of 3 or more. It’s that much better.
I’ve experimented with using a helmet-mounted PVS-14 on one eye and the MH25 on the other. This takes some getting used to, but in the worst case, I could just shut one eye. What those outings showed me was how I could plainly see an animal at night with my thermal and not at all with my PVS-14. This really drove home the difference between the two.
The experts I talked to said that for navigation a PVS-14 system with an IR illuminator is the way to go and for detection/identification/shooting thermal gets the nod. I would tend to agree, particularly for vehicle navigation. Thermal cannot see through a windshield for example, whereas PVS-14’s can. And it isn’t that you can’t navigate on foot with the MH25, it is just much easier with bridged PVS-14s or even a single PVS-14. And again, thermal beats PVS-14 for detection by many multiples.
The Bottom Line
As is the case with most people, the first time I considered buying a thermal optic I simply couldn’t justify the price. But as prices have come down and performance has gone up I reconsidered. Historically the only thermal scanners available were very expensive, but products in the lower end and middle of the market have started being offered. I looked at lower-end units but didn’t really like the 380×280 resolution. At the high end of the thermal scanner market, if you can even find one, is the SkeetIRx. But at just under $16,000 it’s not an option for me. People whose lives or livelihoods depend on thermal clarity will want to invest in such an optic. I’m not one of those people. The resolution of the MH25 at a midrange price point was attractive to me, but it was still expensive, so I got creative. In the summer of 2020, I had a home repair project that was going to cost me what the MH25 costs, so I did the repair myself. I spent every day of every August weekend working on the repair so I could justify the purchase, and I don’t regret doing so one bit. I love the MH25 and having worked hard to earn it makes it all that much better. Everyone’s situation is a little different, but if you night hunt and look through the MH25 you will want one too.

Test Run
Before making such a large investment, it is possible to rent before you own. Ultimate Nightvision offers a three-day rental of the MH25 for just $225. This program lets you try the unit for a weekend without being cost-prohibitive. For that matter, thermal riflescopes and other night vision devices are available for rent at a reasonable cost from Ultimate Nightvision. Should you choose to purchase a unit the entire rental fee will be applied to your purchase, and they send you a new unit rather than you keeping the rental. A night or two of hunting with thermal will convince most serious night hunters that they are worth the investment.
In the second article of this series, I will review the Bering Optics SuperHogster riflescope. Having a thermal scanner like the MH25 is only half the night hunting battle. A thermal riflescope completes the package.
Here is a video that attempts to demonstrate the difference between PVS-14 night vision and thermal night vision. Be forewarned, the video in no way accurately shows the actual resolution of the Mini MH25. The reason is that it is extremely difficult to align a video camera to what the user sees in thermal units. I spent several hours attempting this and I failed. However, the embedded video does demonstrate the thermal advantage.
Hits
The optical clarity and resolution of this unit is nothing short of amazing. The size and weight can’t be beaten. The 3-year warranty is also a plus. The simplicity of the one-knob adjustment system is a big advantage in the dark.
Misses
The iris-style lens cover is a nice idea, but not very practical. It would also be nice if the PVS-14 style eyepiece came with the unit instead of being an additional cost. Speaking of cost, the price is out of reach for many people.
Specs
Resolution 640×512
Pixel Size 12 micron
Refresh Rate 50Hz
Objective lens 25mm
Field of View 17.5×14 degrees
Digital Zoom 1-8x
Display Resolution 1280×960
Warranty 3 years
Price $4,499 ($225 for 3 day rental)
