For more information, visit [track-link url=”https://beyondhuman.com/radius/” campaign=”SilencerCoRadius” target=”_blank”]https://beyondhuman.com/radius/[/track-link].
To purchase a SilencerCo product on GunsAmerica.com, click this link: [track-link url=”https://www.gunsamerica.com/Search.aspx?T=silencerco” campaign=”SilencerCoRadius” target=”_blank”]https://www.gunsamerica.com/Search.aspx?T=silencerco[/track-link]

There’s something extremely gratifying and addicting about ringing steel at 1,000 yards. With new advancements in technology and ballistics, it has never been easier or more affordable to reach new extremes. Helping us get there is [track-link url=”https://silencerco.com/” campaign=”SilencerCoRadius” target=”_blank”]SilencerCo[/track-link] and [track-link url=”https://beyondhuman.com/” campaign=”SilencerCoRadius” target=”_blank”]SWR[/track-link] (SilencerCo Weapon Research).
[track-link url=”https://silencerco.com/” campaign=”SilencerCoRadius” target=”_blank”]SilencerCo[/track-link] is well known for their innovative suppressor designs and have some of the quietest cans on the market. A few years ago, they started a research division, SilencerCo Weapon Research (SWR), to broaden their product offerings. Their goal is to “bring cutting-edge technology within reach,” and they have done just that with their first product, the [track-link url=”https://www.store.silencerco.com/products/swr-radius?variant=12534947652″ campaign=”SilencerCoRadius” target=”_blank”]Radius[/track-link] rangefinder.
Overview
This isn’t any ordinary rangefinder. It is the first compact rail-mounted rangefinder capable of ranging out to one mile on reflective targets. The Radius can be mounted vertically or horizontally on any standard Picatinny rail. With continuous range, primary and secondary readings, the Radius allows the shooter to stay on the gun while engaging multiple targets in rapid succession. All this for an MSRP of $999.

Specs
- Power: (2) CR123A Lithium Ion Batteries (included)
- Height: 2.30 inches
- Length: 5.80 inches
- Weight: 18.2 ounces with batteries/17 ounces without
- Ranging capability: Reflective target: 1 mile; Non-reflective: 1,000 yards
- Resolution: 1 meter
- Operational temperatures: -20˚F – 120˚F
- MSRP: $999
Features
-

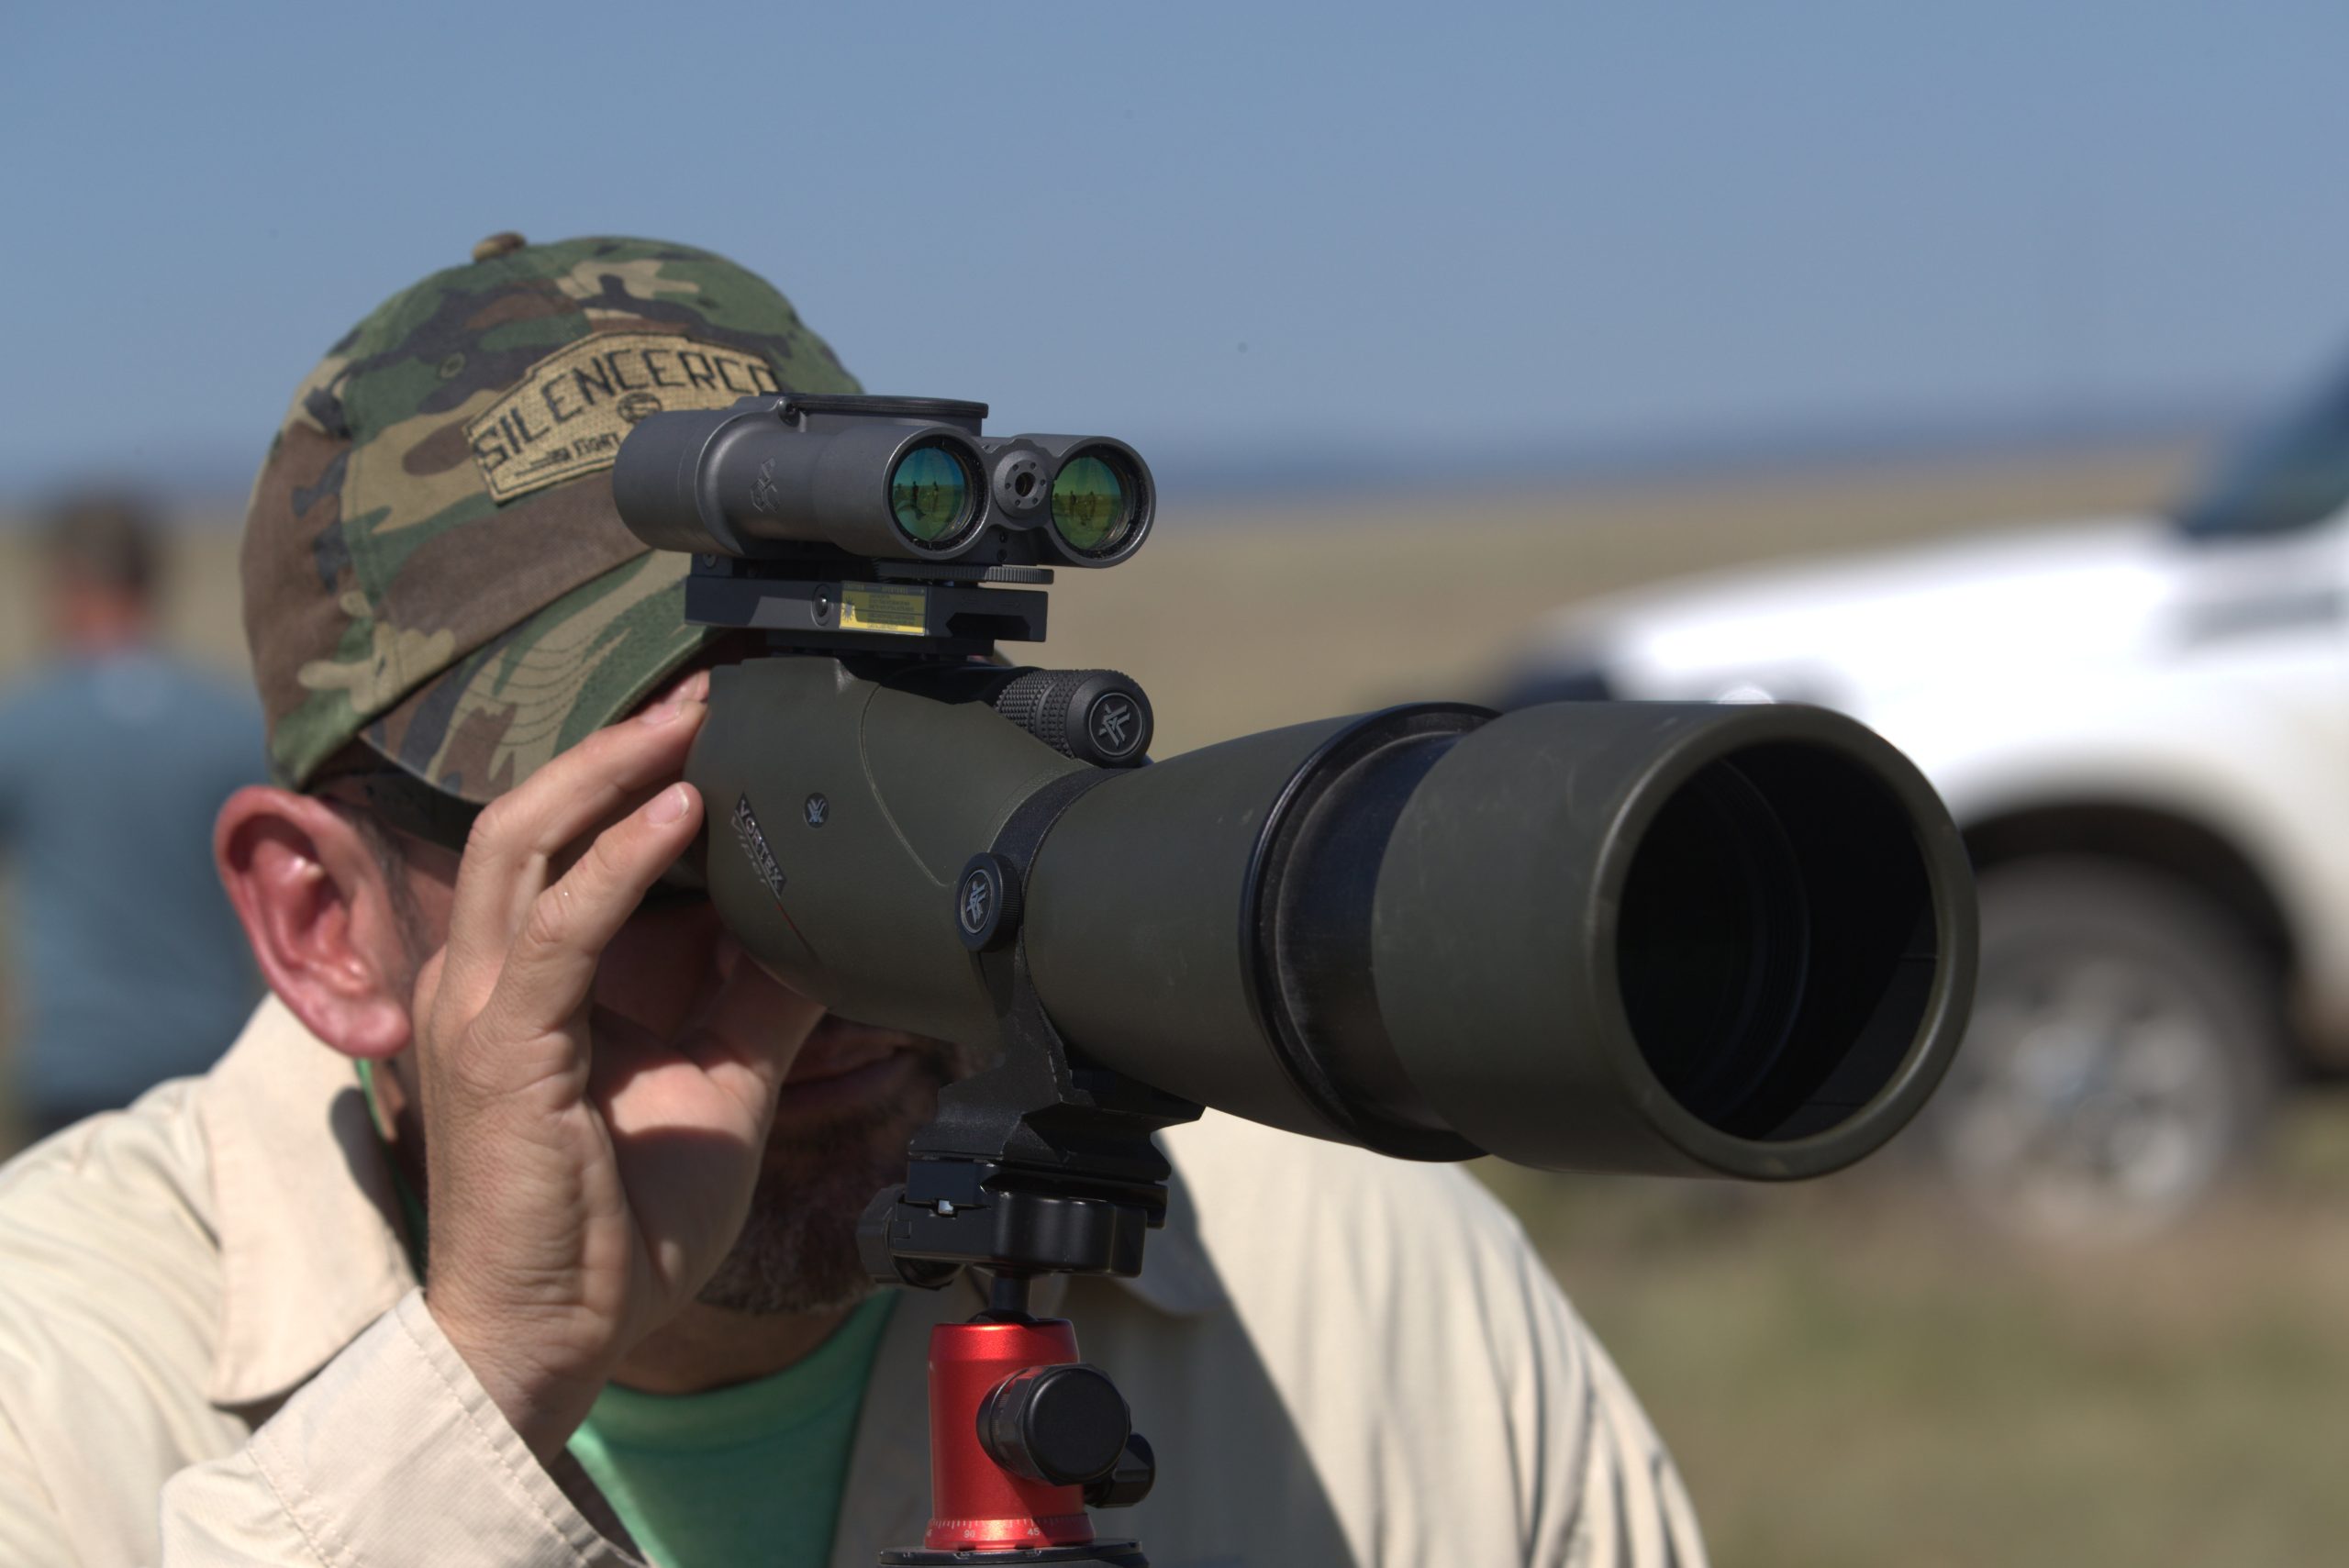
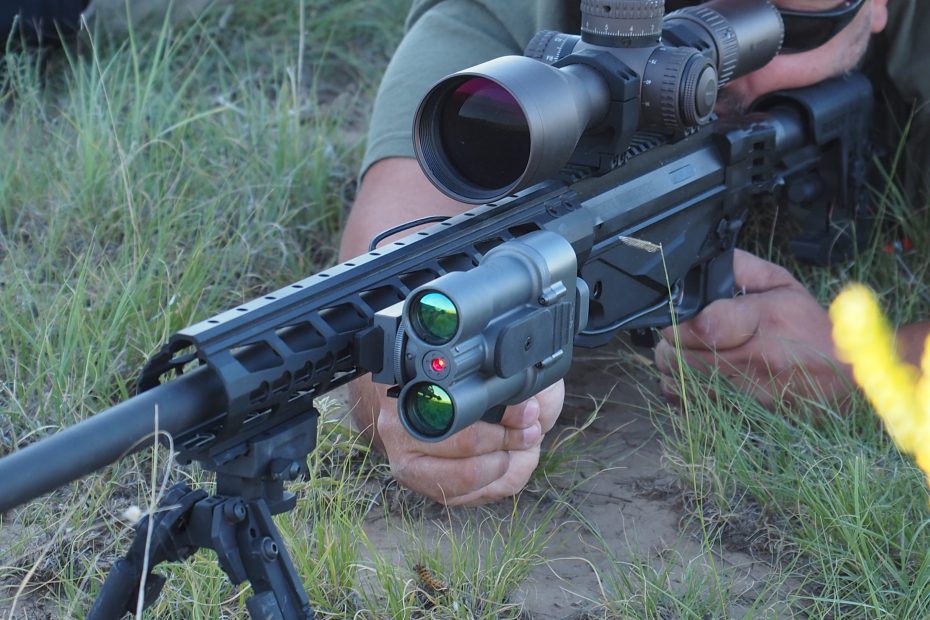
The top-mounted configuration made it easy to view the Radius display while remaining on the gun. Aluminum construction with LED display
- Mounts vertically or horizontally on rail
- Adjustable windage and elevation knobs
- Continuous ranging for up to 12 hours
- Continuous or single-shot operating modes
- Adjustable display brightness
- Shock resistant across all calibers
- Compatible with Picatinny MIL-STD-1913 Rails
- Included pressure switch for remote operation
Upon first sight, it was immediately obvious to me that the Radius was a high-quality product. It reminded me of something you’d see in a futuristic sci-fi film, in a good way. It’s built on an all-aluminum waterproof housing that feels solid and rugged. The LED display is bright and easy to read. It can be removed and rotated when mounting the Radius on the side or top of the rail. Three possible range readings are displayed in case of interference in your choice of yards or meters. Each control button, topped with a durable rubber cap, provides positive tactile feedback. Co-aligned with the IR laser is a visible red laser used when zeroing the Radius. Windage and elevation knobs are built into the mount with no tools required for mounting or adjustments. It comes with a remote pressure switch that does well when placed near the trigger for quick single-shot ranging operation. SWR clearly spent a great deal of time designing and perfecting the Radius. It’s refreshing to see a new company create innovative products while maintaining a high level of manufacturing quality.
Using the Radius

Until recently, I had never had the chance to shoot past 300 yards. Everything I hunt around Texas is typically within 200 yards. I grasped the basic principles of long-range shooting—hold overs, and windage adjustments—but didn’t take it seriously. Precision long-range shooting has become increasingly popular throughout the shooting community and I’ve been wanting to experience it for myself. The universe unexpectedly manifested an invitation for me to shoot with the new Radius rangefinder paired with a [track-link url=”https://silencerco.com/silencers/omega/” campaign=”SilencerCoOmega30″ target=”_blank”]suppressed[/track-link] 6.5 [track-link url=”https://www.ruger.com/products/precisionRifle/models.html” campaign=”SilencerCoRadiusRugerPrecisionRifle” target=”_blank”]Ruger Precision [/track-link]rifle at distances exceeding 1,000 yards. A fantasy come true.
I flew to Albuquerque and drove 250 miles north to the T.O. Ranch just south of the Colorado border, near Raton New Mexico. The first day of shooting took place at the NRA Whittington Center. Founded by the NRA in 1973, the Whittington Center is an impressive shooting facility with a wide variety of ranges for all shooting disciplines. They offer full guided hunts, training courses and on-site lodging/campsites, and it hosts competitions. There’s also an amazing gun museum in the back of the gift shop.
After being greeted by our host and signing the appropriate waivers, we ventured to the Unknown Distance course that had targets as far as you could shoot. We were all anxious to sight in the Radius.
Our Setup
- Rifle: 6.5 Creedmoor Ruger Precision Rifle with SilencerCo [track-link url=”https://silencerco.com/silencers/omega/” campaign=”SilencerCoOmega30″ target=”_blank”]Omega 30[/track-link] suppressor
- Optics: [track-link url=”https://www.vortexoptics.com/product/razor-hd-gen-2-45-27×56-riflescope-with-ebr-2c-mrad-reticle/reticle” campaign=”SilencerCoRadiusVortexOptic” target=”_blank”]Vortex Razor HD GEN II 4.5-27×56[/track-link], SWR Radius Rangefinder

Setting up the Radius was remarkably easy. You just release the quick-detach lever and place it on your rail. Close the QD lever to lock it in place. I opted to mount the Radius on the top of the scope while everyone else chose to mount theirs on the side of the rail. I prefer the top mount configuration for a few reasons: It feels more balanced on top, it’s easier to sight in without having to look for the adjustment knobs, and it’s faster for me to see the display when scanning targets.
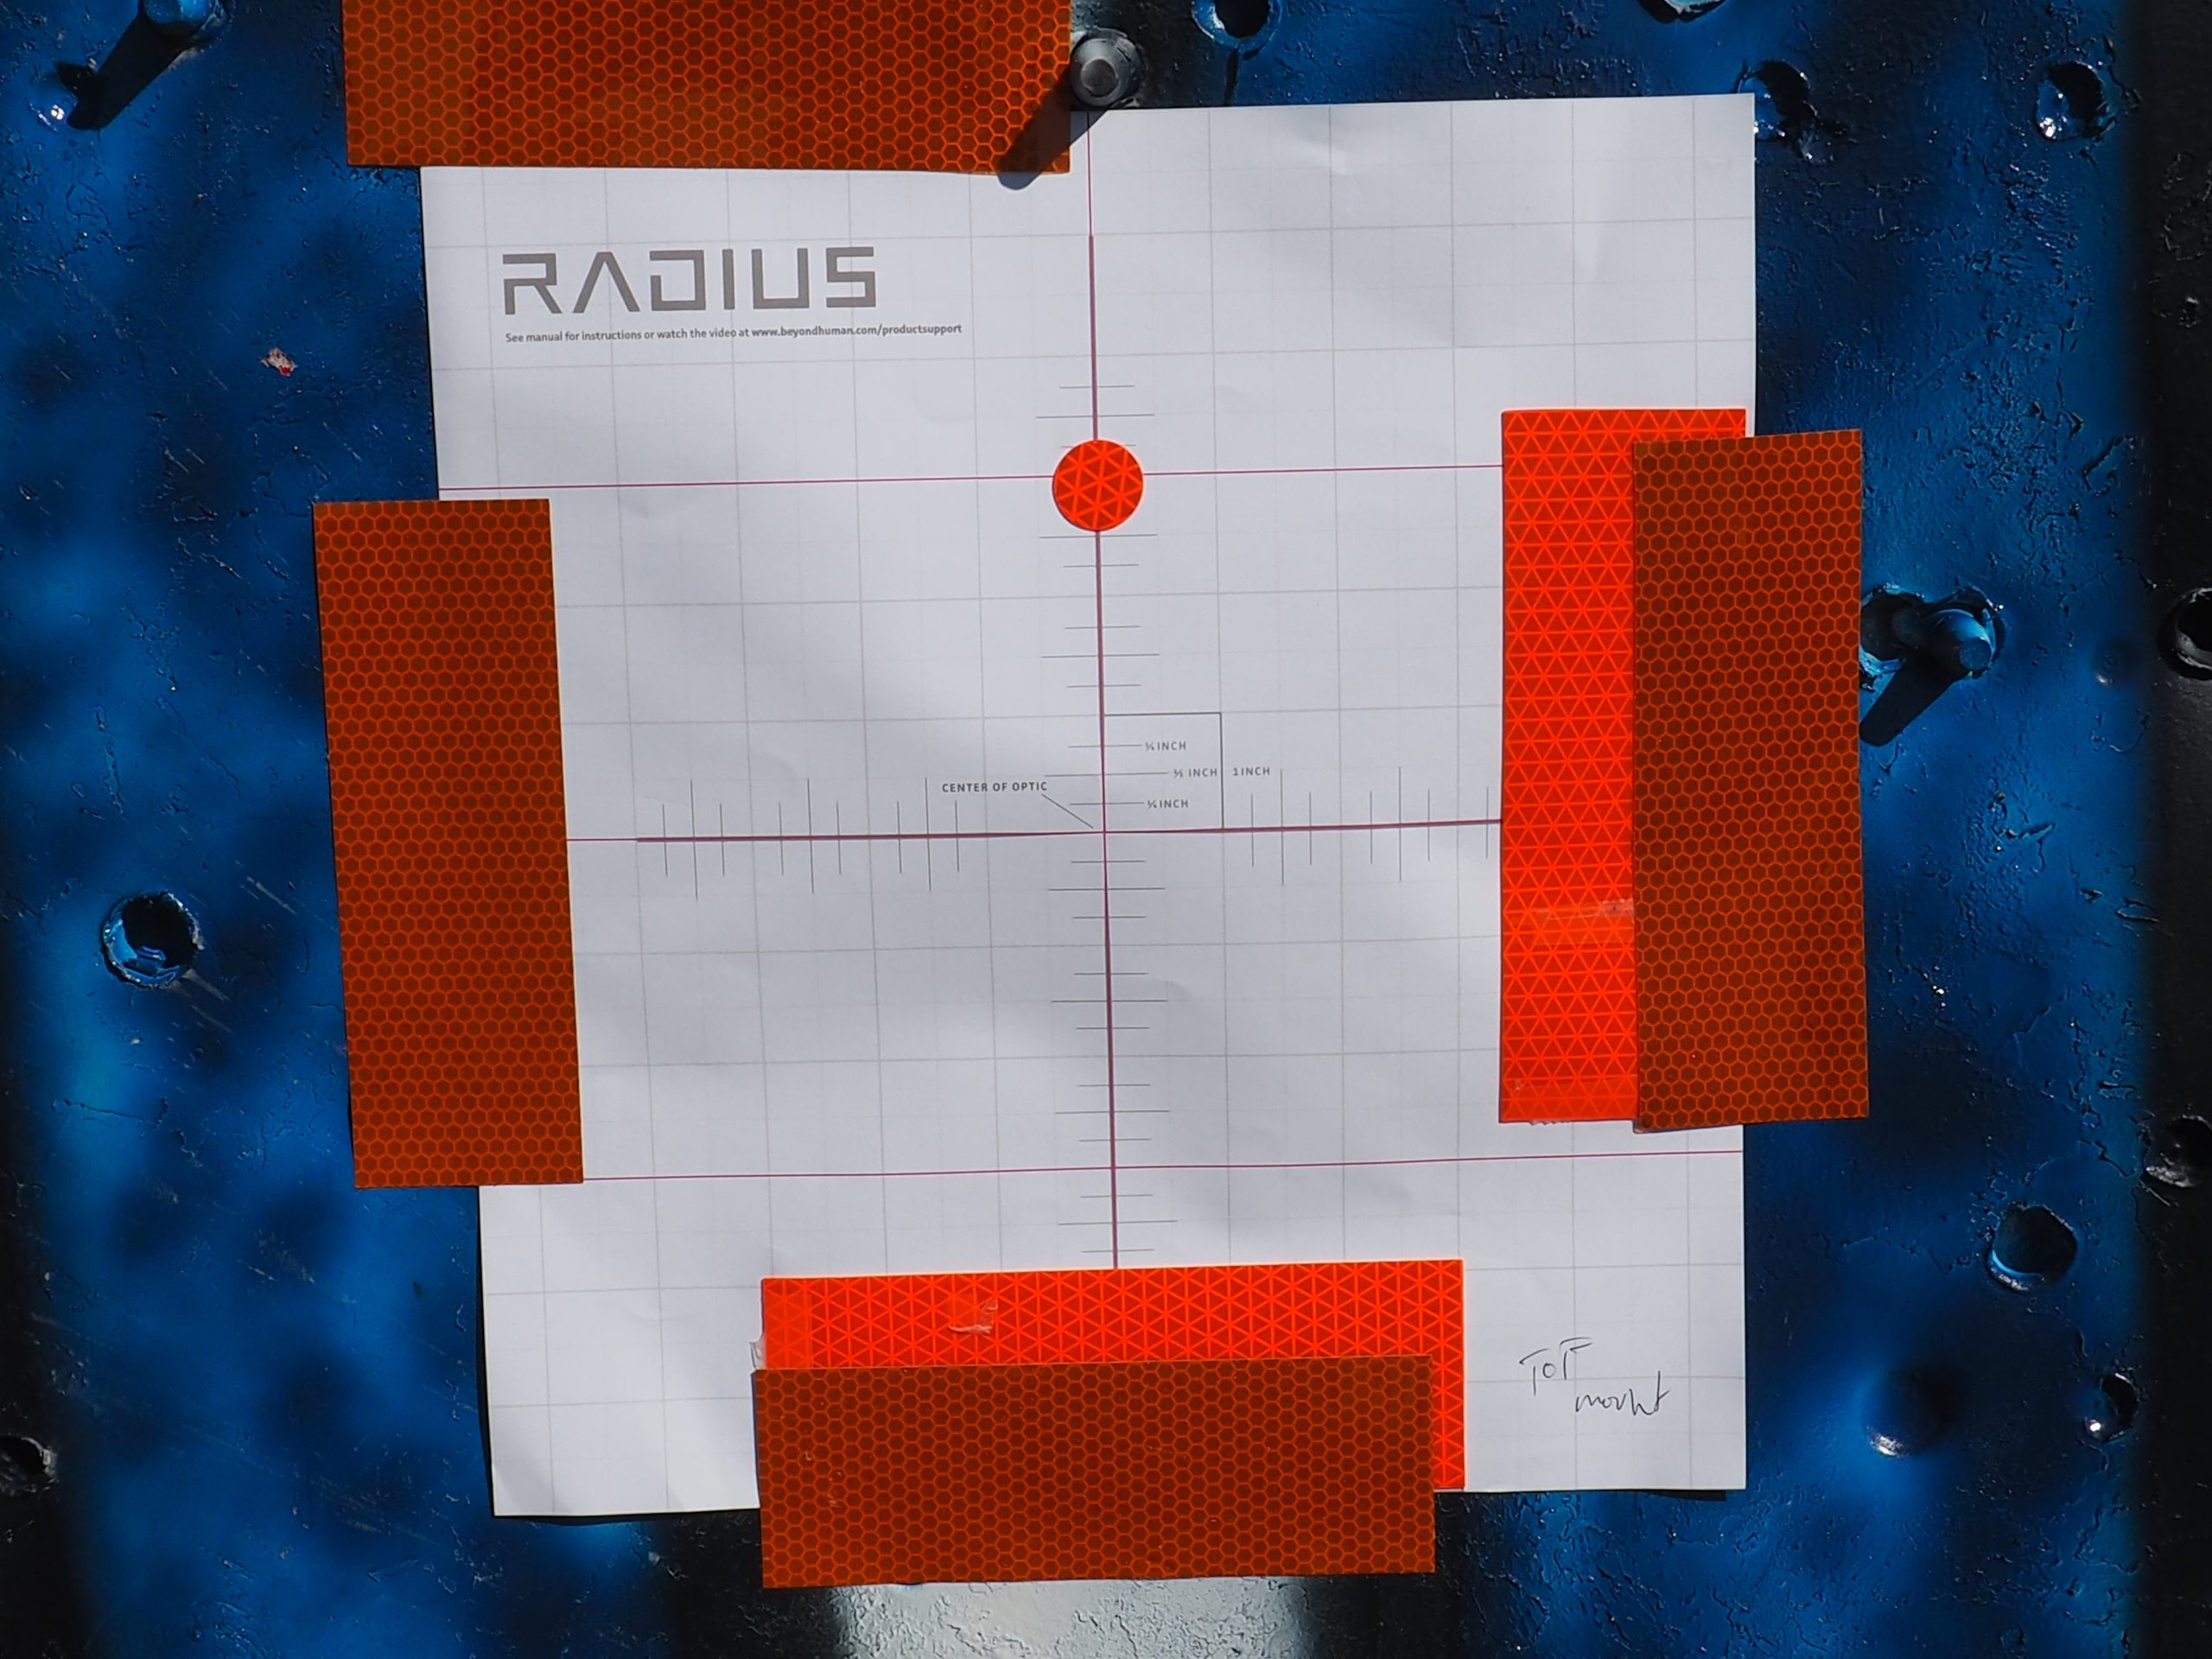
To sight in the Radius, affix the provided target to a vertical surface and place a couple pieces of reflective tape on the horizontal and vertical edge of the paper target. (The reflective tape makes the visible laser show up easier when sighting.) Then, measure the distance from the center of the reticle on your scope to the visible laser on the Radius. Mine was at 3 inches above the center of the reticle. Position the reflective dot 3 inches above the center of the paper target. This reflective dot is where the visible laser will end up after zeroing the Radius. The dot ensures the Radius is perfectly parallel to the reticle on the scope. Sitting 50 yards away from the paper target, I turned on the visible laser and aimed for the reflective tape. I quickly found the laser and started making the necessary windage and elevation adjustments to meet the reflective dot. Once the laser is lined up, turn it off and you’re all set.
The first target was a 3-inch-square steel plate with a car painted on it. With the target in my sights, I engaged the pressure switch to operate the Radius. “812 yards” immediately started glowing from the display. Using 143 -gr. ELD-X Hornady ammunition, I checked my dope card for 800 yards and dialed my scope up 5.6 mil. I aimed for the car door handle and pulled the trigger—a quiet whisper was followed by a loud GONG as the projectile hit the target. All I could think was, “that was way too easy.” Mystified, I moved on to a smaller 16-inch bullseye plate. The Radius confirmed the target at 857 yards. After adjusting my scope an additional .2 mil, I put the bullseye in my crosshairs and gently squeezed the trigger. Another quiet puff emerged from the muzzle with a THWACK echoing through the canyon. I couldn’t wipe the smile off my face.

We were all getting comfortable with the Radius system and our rifles. To make it interesting, we set up a table at a 35˚ incline. The only rule was shooters must use the table in some way to steady themselves while engaging four targets. Shooters must hit targets from right to left, and back then shoot a random fourth target called by the spotter. I propped my gun on the edge of the table as I sat on the incline and steadied myself as best I could and set the Radius to continuous range. The first target was 650 yards; adjusting my elevation, I planted one dead center. Second target, 612 yards—hit. Third target, 760 yards—hit. Man, this was too easy! The last target called was a small 5-inch rock sitting on the cliff face at 675 yards—turned to dust. My jaws were starting to get sore at this point from the permanent grin on my face. Transitioning from the reticle to observe the Radius display felt natural and seamless. The continuous range feature saved time and ranged targets immediately. The Radius gave me an overwhelming amount of confidence.
The next course demonstrated the practical use of the rangefinder when sitting in awkward positions that are often encountered during a hunt. We set up three different stations and three different targets. Each shooter had to place two successful shots on target before advancing to the next station. The first station was a prone shot at the bottom of the hill target at 411 yards. Second station was 30 yards up the hill. The second station forced you to sit on a low branch using the branch above as a rest, with a target at 420 yards. The final station, 20 yards over at another tree using it as a rest at 405 yards. I missed my second shot on the first target, but was still able to run the course in 58 seconds. I’d never be able to shoot that fast using a handheld rangefinder. Again, the continuous range made it possible to quickly range and adjust accordingly.

The final challenge of the day was a shoot-off for an Omega suppressor. We were fortunate enough to have a [track-link url=”https://mason-target-systems.myshopify.com/products/electronic-mason-target-systems-pacifica-target” campaign=”SilencerCoRadiusMasonTarget” target=”_blank”]Mason Target Systems Pacifica Electronic Target[/track-link] for our competition. The target features an 18×18-inch AR500 steel plate with wireless capabilities out to 1,500 yards. Each hit is recorded and scored on an iPad app. We setup the target 600 yards down range and each took five shots at the target. It was late in the day and the heat mirage made it difficult to see the target, but I ended up scoring 30 points putting me in a three-way tie. The final shoot off—one shot each. The first shooter hit low; 5 points. My turn. I held at the top edge of the target gently squeezed the trigger and scored 8 points. The last shooter missed. Unbelievably, I won! We called it a day, packed up our tables and headed back to the ranch.
Real-World Usage
Early the next morning, we drove to fields littered with prairie dogs. Before you get too upset and call PETA, let me explain that prairie dogs cause many issues for ranchers and livestock. They create vast underground tunnel systems that can cause injuries to horses, humans and livestock. Prairie dogs are carriers of diseases and decimate crops. With that said, we were essentially doing the ranchers a favor.

We sighted in our Radius’ again and loaded up the rifles. First one ranged at 210 yards—I barely heard the gun go off and he sure as hell didn’t. Gone in a flash, his confused buddy standing next to him quickly joined him on the other side. I was able to successfully range a small 12-inch prairie dog at 450 yards. The other shooters using the side-mounted configuration had a harder time getting positive readings on the small rodents. Another reason why I believe the top-scope mount is the way to go. The Radius proved to be a treasured tool when shooting these little critters. It allowed me to quickly range and adjust between targets. My accuracy increased and ammunition was rarely wasted. The only time I had difficulty ranging the tiny varmint was at 500 yards in the late afternoon. Heat mirage was obscuring my vision, making it difficult to get a reading.
We ran the rifles hard, throwing 1,400 rounds down range over the two days of shooting. The Ruger Precision Rifle proved to be a top performer and more accurate than most $3,000 setups. One problem I had was with the Magpul magazine not fully seating properly, but I’ll attribute that to a faulty magazine and user error. The Vortex Razor HD scope with FFP reticle was crystal clear and served me well during the shoot. I only wish they would make it lighter.

The Omega suppressor made the shoot much more enjoyable. With virtually no recoil or and little noise, I could shoot all day long without getting fatigued. It’s nice to be able to have a conversation 6-feet away from five guys shooting rifles without wearing ear protection, and no bulky ear muffs to hassle with. Not having to wear ear protection increases your situational awareness in a hunting scenario and could be the difference in having a successful hunt.
The Radius performed well throughout the two-days of abuse. The battery indicator on my unit fell to 75% at the end of day 2. It was on continuous mode most of the time and sat in the sun for several hours. The only issue we had during the shoot was one pressure switch connector got bent from the rifle falling over. It didn’t damage the Radius, but it needed a new switch.
Overall the Radius exceeded my expectations in terms of performance and accuracy. It was easy to install and use. If you ever hunt in canyons or stalk big game in the mountains, then you know how valuable having the right equipment can be and how important each second is when going for the kill. The Radius saves you time and frees your hands, giving you complete control. If you’re in the market for a rangefinder, look at the Radius. I know I’ll be ordering one soon.
[one_half]

[/one_half]
[one_half_last]

[/one_half_last]
